We are delighted to announce that Drawing Automation is now available! This game-changing feature does exactly what it sounds like. It saves you significant time by automating the tedious steps of creating a drawing. In our 2024 Fusion Roadmap, we shared our vision for Autodesk AI, and Drawing Automation is a big part of our goal to bring you new ways to automate time-consuming tasks across design and engineering workflows.
Drawing Automation offers a ton of handy benefits, and the best part is that it works out of the box with no setup required. This means you can try the feature out with your existing templates or create new templates. It’s fully customizable to suit your preferences.
At a glance, here are just some of the things Drawing Automation will automatically do for you:
- Create and lay out your drawing sheets for each component in a model
- Place sheet metal flat patterns and bend tables
- Place parts lists and balloons for assemblies
- Place sheet metal bend tables and IDs
- Rotate components to the best orientation for documentation
- Apply center lines and marks
- Break long components
- Scale views and nest them on the sheet
- Create ‘generative’ style dimensioning strategies
Now let’s walk through how to get started with Drawing Automation.
How to get started
To get the most out of drawing automation, set up a template. This is optional, but if you do set up your templates in advance, you won’t have to set up your drawing preferences from scratch each time you create a drawing.
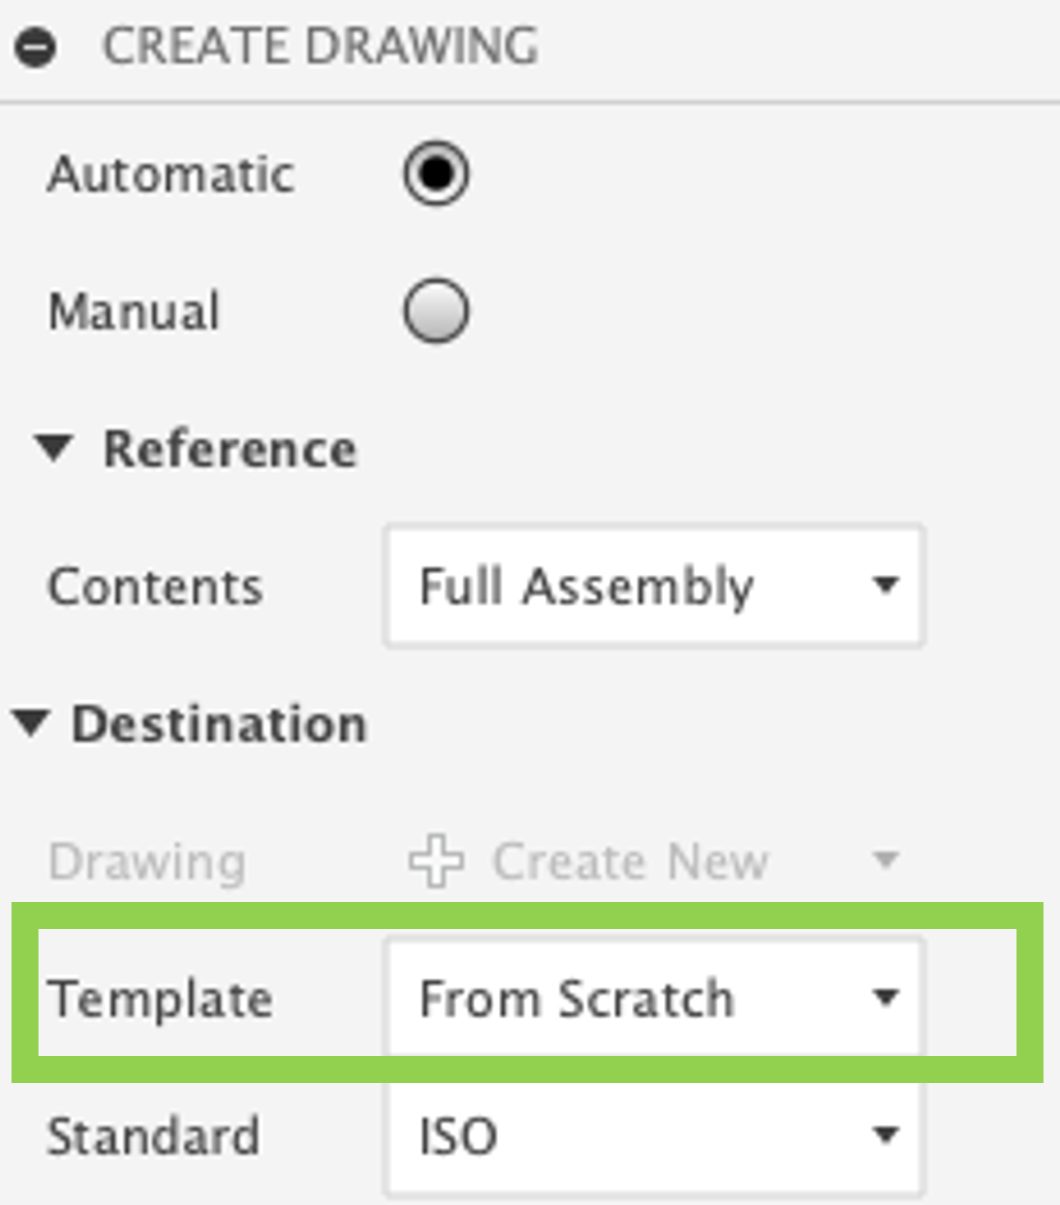
You can either start with an existing template, which honors the settings in the template’s Document Settings, start a template from scratch, or create a drawing from a design.
Setting your automation settings
Once you have a template, you can set your automation settings. Drawing Automation settings are ‘Forward Create,’ which means that the settings will not be applied to the current drawing; they will be applied to the next drawing created.
Remember that the settings in your Template are used for drawing creation. If you make changes to the Automation settings while in a drawing, make sure to ‘Push to Template’ so that they appear in your template.
Auto Dimensions command
Drawing Automation offers a powerful command called Auto Dimensions, which you can use for automatic dimensioning or for adjusting automatically created dimensions. If you don’t want drawings to have automatic dimensions, simply un-tick ‘Auto Dimension.’
Drawing automation and fasteners
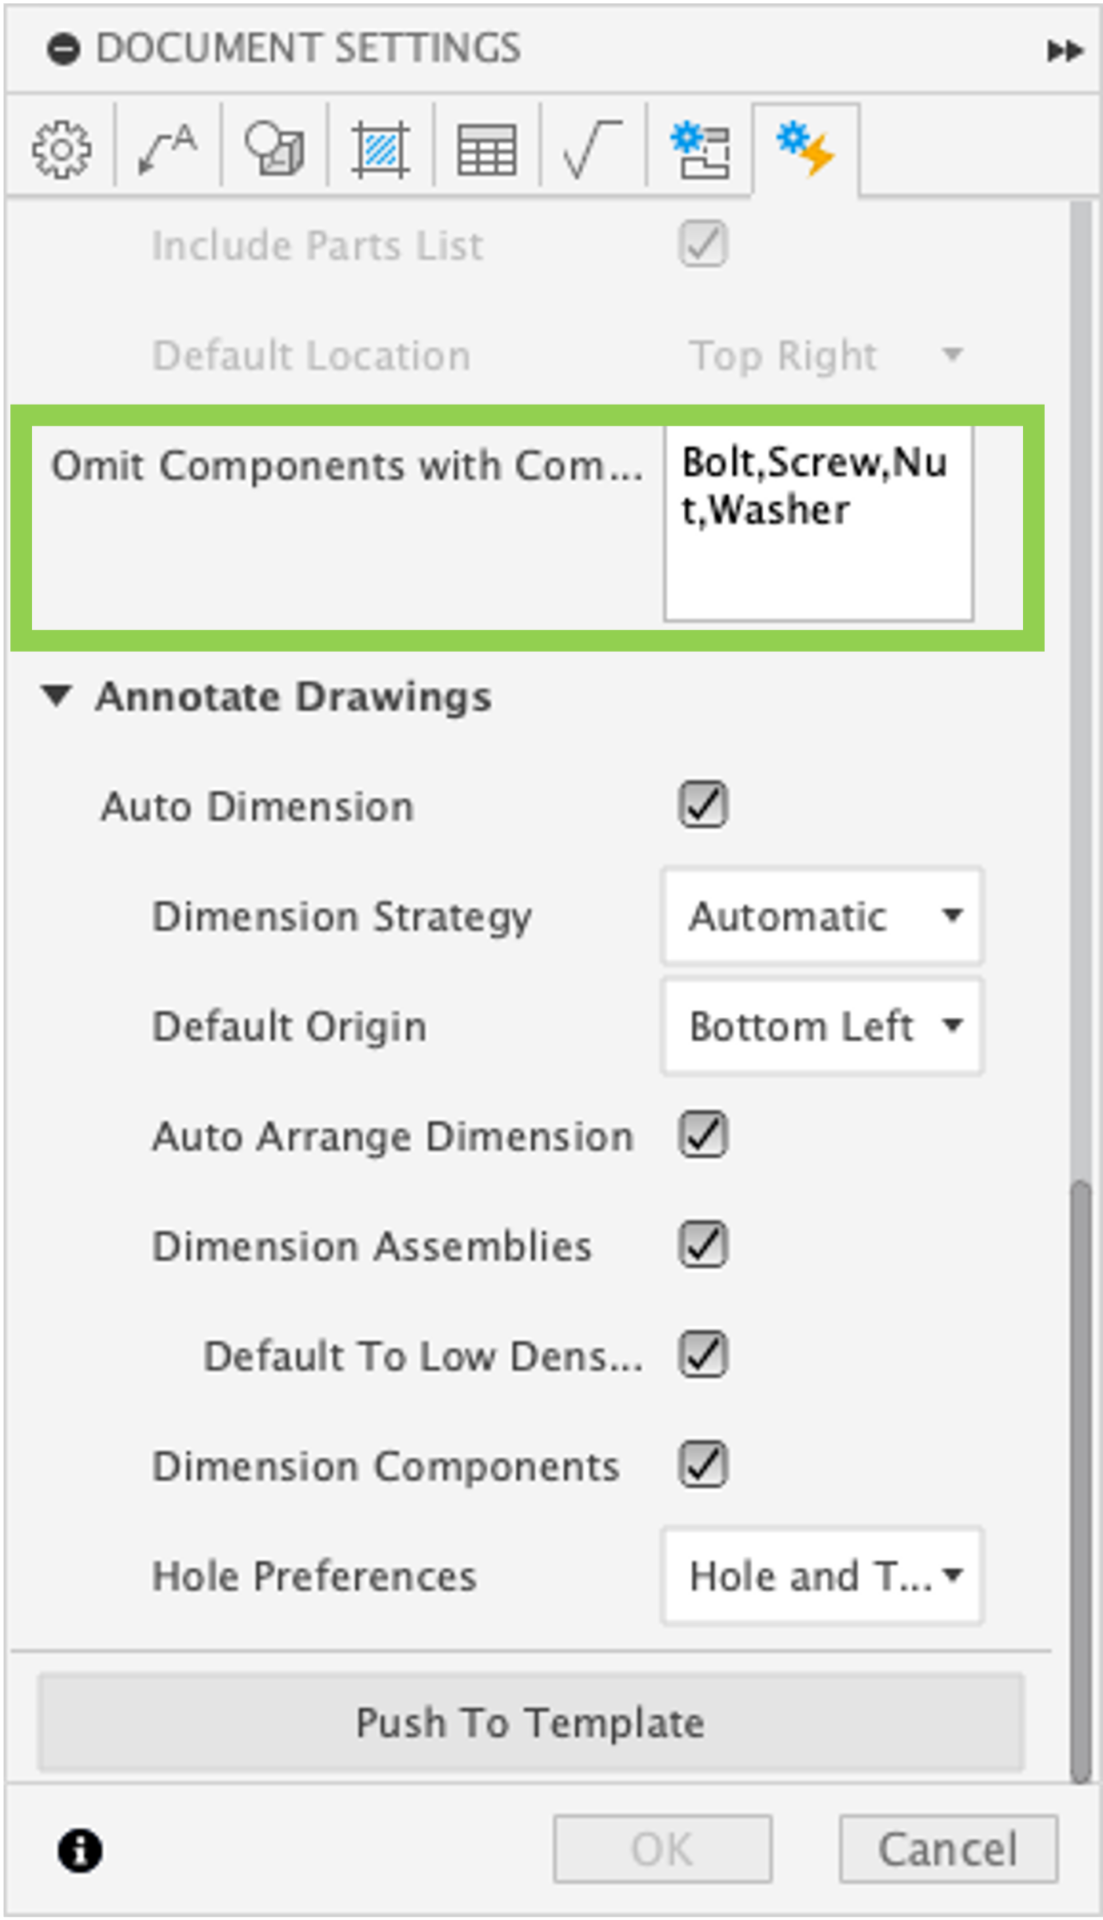
Keep in mind that Drawing Automation ignores standard fasteners from the Autodesk fastener library. The “Omit list” (in Document settings) is designed to assist with removing other parts that you may not want to document. This list enables you to set additional components to ignore. Default settings are “Bolt, Screw, Nut or Washer.” This list is customizable and should be set in the drawing template. The “Omit list” will not create drawings for any component named. For example, if a component is called “Walnut Base,” it will be omitted, as “nut” is listed in the omission list.
Once your drawing is ready, you can review it and make any necessary changes. You can also use the Tidy Up command to automatically rearrange, re-sort, and/or resize objects in the sheet.
To learn more, visit the Fusion Help Documentation page on Drawing Automation.
Ready to subscribe to Autodesk Fusion?
Call us: (08) 9367 2888
Email us: sales@advancedspatial.com.au