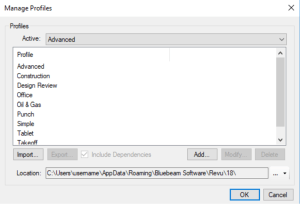
Revu comes preloaded with several Profiles that are geared toward specific jobs and functions, including:
- Revu: For users who prefer a basic, streamlined interface. Appropriate for most users.
- Revu Advanced: For users who would benefit from a more robust interface. Users upgrading from Revu 2017 or earlier might find this layout more familiar.
- Quantity Takeoff: For estimators and specifiers who need to view plans and specs, conduct quantity takeoffs or add markups to their PDF files.
- Field Issues: For users completing a punch process.
Go to Revu > Profiles to see a list of available Profiles. The Profile that is currently active will be checked. To change Profiles, simply select another one from the menu. Once selected, the Revu interface will update based on the settings defined in the new Profile.
You can customize the Revu interface and save your configuration as a Profile. There is no limit to the number of custom Profiles you can create.
To create a custom Profile:
- Configure the Revu interface as desired, arranging toolbars, tabs, panels and so on as needed. This configuration will be the custom Profile.
- Go to Revu> Profiles > Manage Profiles to open the Manage Profiles dialog box.

- Click Add. The Add Profile dialog box opens.
- Enter the name of the custom Profile in the Name field and click OK. The Add Profile dialog box closes and the new Profile is added to the Profiles list and selected as the active Profile.
- Click OK to close the Manage Profiles dialog box.
You can make changes to any local Profile in Revu, including the preloaded Profiles.
To save changes to a Profile:
- Go to Revu > Profiles and select the desired profile.
- Make any desired changes to the Revu interface.
- Go to Revu > Profiles > Save Profile. The old profile interface is replaced with the current configuration.
– Changes to a Profile are also saved automatically when Revu is closed.